
A network drive is software that enables the operating system to communicate with network hardware, facilitating internet and network connections. However, sometimes you may encounter issues when these network drives might not appear on your Windows device. If you are unable to find network drivers on your Windows PC, don’t lose hope.
Luckily, there are several methods available online that you can try to utilize those network drives again. In this comprehensive guide, we will explore the common causes of this problem and provide step-by-step solutions to show you how to fix network drive not showing issues, ensuring you get your network drive back online. So let’s get started!
What Causes Network Drive Not Showing?
Before you learn different workarounds to resolve the network drive not appearing on your system issue, it is important to find the exact cause for this issue. Some main reasons are as follows:
- Network Configuration Issues: Improperly configured network settings can prevent the drive from being detected.
- Firewall and Security Software: Overzealous security software can also block the network drive.
- Drive Mapping Problems: If the network drive is not mapped correctly, or the mapping might have been lost then you may fail to access those drives.
- SMB Protocol Disabled: The Server Message Block (SMB) protocol might be disabled which makes the network drive disappear.
- Outdated or Corrupt Drivers: Network adapter drivers might be outdated or corrupt.
- Windows Settings and Updates: Certain Windows settings or updates can interfere with network drives.
How do I Fix the Network Drive Not Showing in Windows OS?
Here are some commonly used methods that you can try to fix Network Drive not showing in File Explorer on Windows 11/10/8/7 PC:
Method 01: Configure the registry of User Account Control
Configuring the registry of User Account Control (UAC) involves modifying specific registry settings to adjust UAC behaviour and thus easily fixes the network drive not showing issues on Windows OS. Before you proceed with these methods, you must note that modifying the registry can have serious consequences if not done correctly. Here’s how to configure the registry of UAC to fix the network drive not showing issue:
- Press the Windows + R keys to open the Run prompt, type “Regedit” and press Enter to open the registry editing program.
- Now, go to the following address: llHKEY LOCAL MACHINE\SOFTWARE\Microsoft\Windows\CurrentVersion\Policies\ System.

- After reaching the above folder location, create a new DWORD Value. Right-click and select the key to create the DWORD Value.
- Rename the entered value EnableLinkedConnections and right-click to change its value from 0 to 1. This will allow the administrator in the Admin Approval Mode user form and all other User Account Control features (UAC).
- Lastly, click OK to save the changes. Once done, close the Registry Editor and restart your device.
Method 02: Turn ON the SMB Features
Turning ON the SMB features on your Windows device ensures that your computer can properly communicate with other devices on the network that use the SMB protocol for file sharing. Here’s how to enable SMB options on Windows PC:
- Firstly, type Program and Features in the search box located at the bottom-left corner.
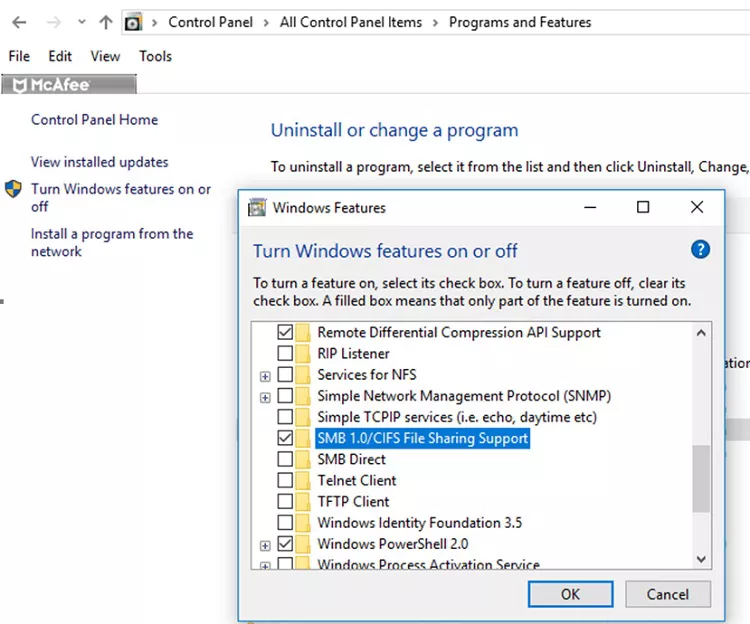
- Now, choose the Turn Windows Features on or off option and from the Windows Feature pop-up that appears on your screen, check all the SMB features.

- After that, click the “OK” button and reboot your PC to save the changes that you’ve made.
Method 03: Temporary Disable Firewall and Security Software
Sometimes firewalls and security software block network drives and make them inaccessible. In such cases, you can follow the below steps to temporarily disable them:
- Type CP in the search box, launch Control Panel and go to System and Security > Windows Defender Firewall.

- Now, click on Turn Windows Defender Firewall on or off from left navigation pane.
- Lastly, turn off Windows Defender Firewall for both private and public networks. Also, disable any third-party security software.
After successful disabling, check if the network drive appears. If it does, configure your firewall and security software to allow the network drive.
What if Data Loss Occurs While Fixing Network Drive Not Showing Error?
Instances may occur when you lose important data while applying the above steps to fix the Network drive not showing error. In such cases, you can use professional data recovery software to restore your lost or deleted files. Among several recovery tools available online, the Stellar Data Recovery Professional tool offers several amazing features to make the recovery process simple and quick. The software is a 100% safe and secure option to restore lost files.
Key Features of Stellar Data Recovery Professional Tool:
- The software supports easy recovery of lost files of multiple types, including photos, videos, documents and more.
- Recover data from formatted, corrupted, and encrypted drives.
- Offers dual scanning mode – Quick Scan and Deep Scan to restore your data lost due to complex scenarios such as logical drive failure, RAW drives, BSoD errors, lost partitions, and more.
- This professional data recovery software is available in multiple versions. Check their features and use the one that best suits your requirements.
Here’s how to recover deleted data on Windows using this professional data recovery software:
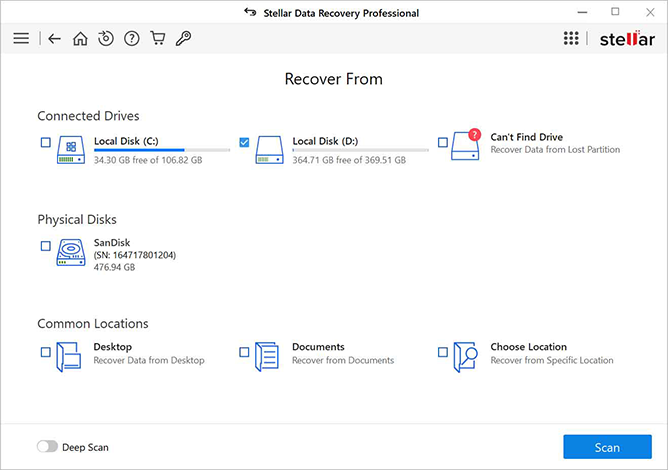
Step 1: After downloading and installing the Stellar Data Recovery Standard on your Windows device, launch it. From the homepage, select the type of file you need to restore and click Next.

Step 2: Now, choose the folder location where your deleted data was earlier stored and click the Scan button to begin the scanning process.
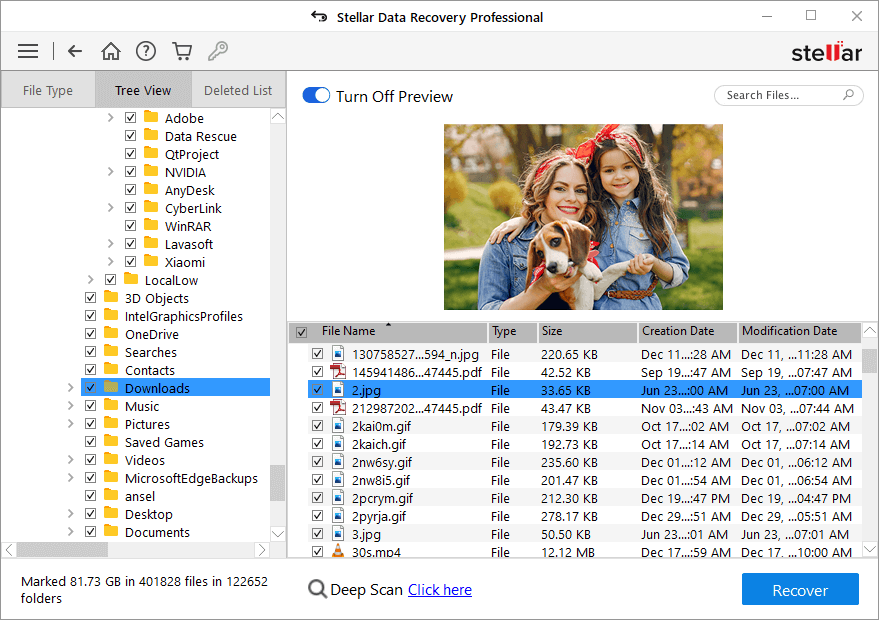
Step 3: After successful scan, preview the recoverable files and choose the files you need to restore. Click the Recover button to save recovered data at the desired location.
Conclusion
Fixing the network drive that won’t show up can be a complex task, but following the above-mentioned steps you can easily identify and resolve the issue. By checking network connectivity, verifying settings, updating drivers, and configuring necessary protocols, you can ensure that your network drive is accessible and functional. Moreover, if you encounter data loss while applying these steps, try using a professional data recovery software to restore those deleted data easily.